Best Tips for in Ground Composting in Trenches, Holes and Mounds
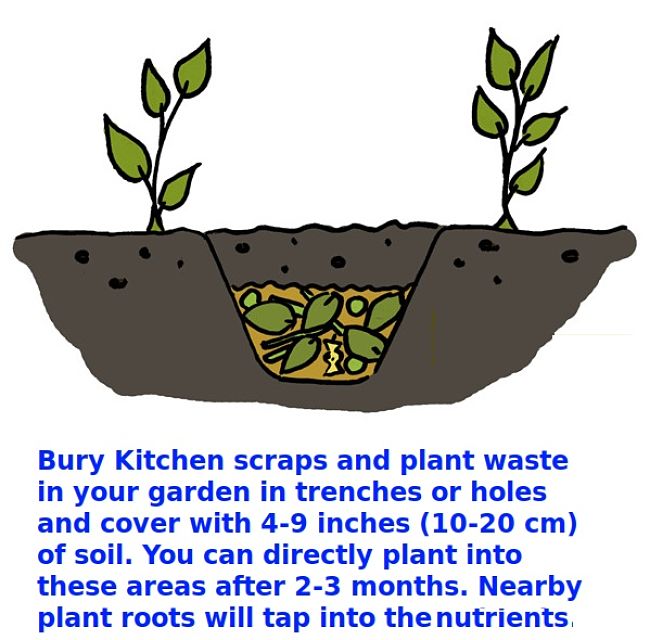
One of the best compost systems is just a hole or trench in the ground - where material is buried and composted directly in the ground. All of the microorganisms and worms in the soil have direct access to the organic material in the soil. It is simple and very effective provided some simple rules and tips are applied. It can be done in holes or in shallow trenches between rows of plants, alternating plants and compost processing each season. It can also be done by placing the organic material on the soil surface and covering with soil to form a mound. The organic material will compost and decompose over 2-3 months depending on the temperature and its thickness.
In some ways it is akin to a fallowing or resting process where strips of soil and left bare to recover after harvesting a crop. If trenches are used the plants adjacent to the trench will tap into the compost and draw nutrients from it even as it is breaking down. This article provides the essential tips to reap the benefits and avoid the pitfalls.
Benefits of in-Ground Composting
Composting in-situ in shallow holes or trenches has many advantages compared with conventional methods in compost bins:
- There is less handling as the compost is already in your garden and does not need to be carried from the compost bin to your garden beds.
- The compost is completely invisible, has no smell or flies and other insects. It is out of site out of mind, with virtually no maintenance or turning required.
- You can do it just about anywhere in your garden.
- You don't have to worry about aerating, sifting, turning or maintaining adequate moisture levels, as you do with a conventional external compost pile. There are no insect or rodent pests to deal with. But dogs and rabbits may be an issue.
- It requires no space in your yard, unlike a conventional compost bin. It is invisible and does not produce any odours.
- It avoids problems with insects and rodents, though large dogs may dig it up.
- It enhances the growth of worms and microbes in the garden bed that break down the scraps into compost. This boosts fertility.
- It helps to retain moisture around the deep roots of the plants nearby
- It can coincide with the time you let a patch of soil rest or lie fallow between plantings
- As the compost is formed, the nutrients in the organic matter are immediately available to neighbouring plants through their deep roots,
- Adequate moisture levels can be maintained as you water the bed areas nearby.
- It is an extension of the no-dig gardening system. The soil can be turned over after 2-3 months to mix the compost through the soil, but this is not required.

Disadvantages and Problems with in-Ground Composting
- It is a cold or passive composting and so is unsuitable for killing seeds and other processes that occur during hot composting. However, the temperature of most bin composts do not get high enough to kill weeds, disease organisms and pests.
- So you should avoid including any viable seeds in the compost you bury that are likely to make it to the surface. The cold composting process will not kill the larger seeds. However, it is unlikely that small seeds will germinate and reach the surface from 6-9 inches (15-20 cm) down.
- Do not include any diseased plant material, which should be disposed of in your refuse bin rather than your compost.
- Dogs and cats may dig it up
- In ground composting takes up areas in your garden that could be planted with flowers or vegetables
- The compost it produces does not have the better structure and even-consistency of bin compost
- The compost is not available for use elsewhere in the garden, but you could have a compost bin as well.
Guide and Tips for in-Ground Composting
The various types of in ground composting are described below.
Start by digging a trench or hole about 6-12 inches (15-30 cm deep), shallower in heavy clay soil. It can be as wide as you like, but 1-2 shovel widths is adequate. Retain the excavated soil. You can dig a long trench and progressively add scraps and cover them with soil over several weeks. Likewise you can dig several holes and progressively use them.
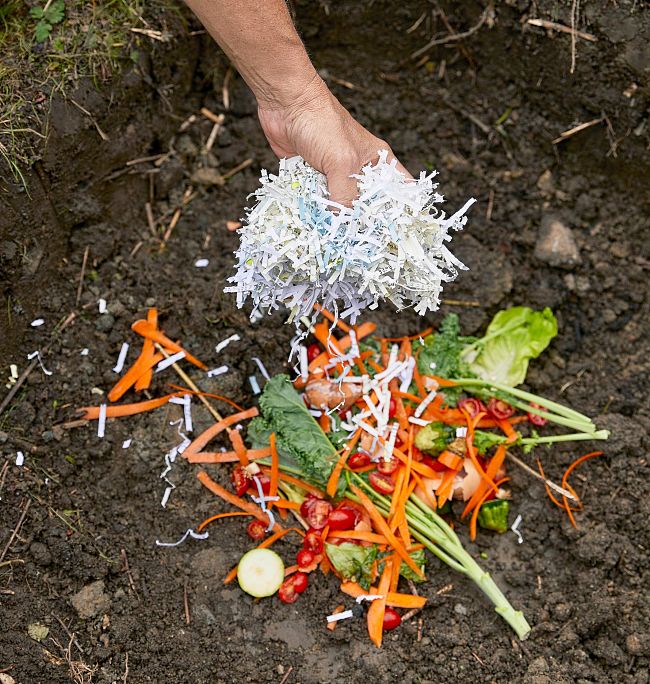
Try to combine green waste and brown waste in about equal proportions. Green waste is ‘wet’ waste, that includes your garden clippings and prunings, old plant materials, kitchen scraps, and similar materials. This material is rich in nitrogen. Brown waste is ‘dry’ waste, that includes dry leaves, straw, wood chips, paper, cardboard and sawdust. It is a good idea to add small amounts of well-rotted cow manure or chicken manure pellets to get the process started.
Layer scraps, garden waste and dry matter in layers, adding some manure. To super charge your trench, sprinkle a cup of lime on top for each square metre of material. Back fill the trench or hole with the retained soil. Cover material on the surface with soil to make a mound. Use labels to identify where you have buried the material. The kitchen scraps and garden clippings will decompose over 1-3 months, depending on the amount of oxygen in the soil, its drainage and moisture level. To improve the soil above the scraps, you can sow a green manure crop of broad beans. You can dig the green manure plants back into the soil after you harvest the crop bringing the buried compost to the surface to aerate it, helping with the composting process.
Three Different Methods of in-Ground Composting
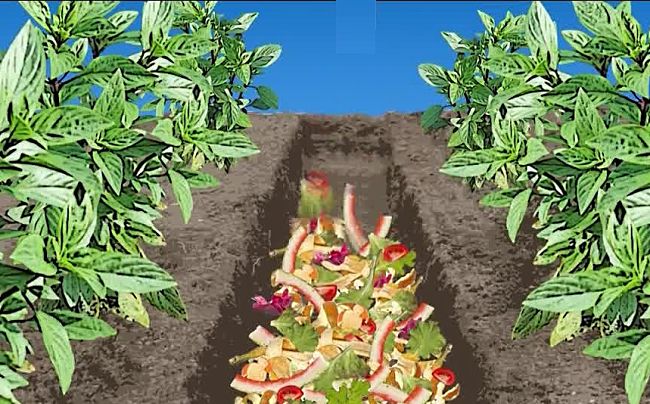
1. Composting in Trenches
Composting in trenches is simple. Start by digging a shallow trench between rows in your garden bed or over a wider area. Add worm-friendly compostable materials, such as spent garden plants, kitchen scraps, small prunings, dead leaves, thinnings, etc., and bury them with the soil you dug out of the trench. You can apply trench rotation shifting the active growing, pathways and composting areas progressively over your garden beds as you harvest various crops. You divide the garden into three zones: a growing zone, a trench composting zone and a pathway zone (if required). Each season, you swap the zones between the garden area. This means, in time, you will progressively compost and fallow your entire garden bed. Trenching between rows of growing plants works in any vegetable or annual garden in which you grow plants are in evenly spaced rows.
2. Composting in Holes
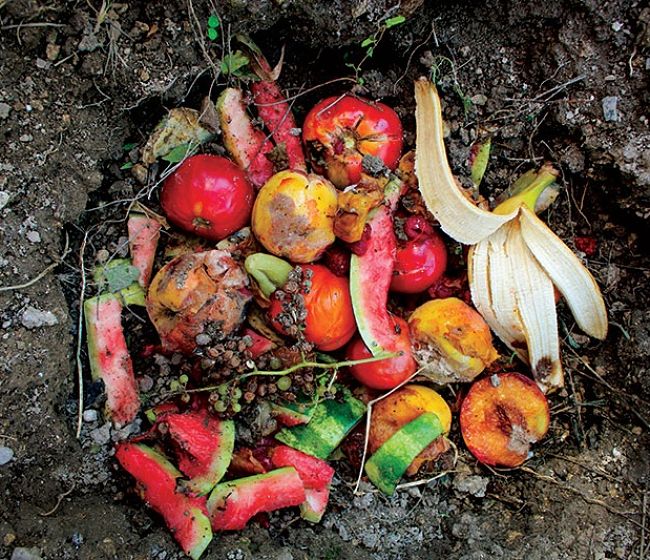
This is the simplest way to practice in-ground composting and it is the most flexible. It works even in perennial gardens, among shrub borders and in less formal garden beds or all shapes and sizes. For each a large bowl of vegetable peelings and kitchen scraps you have collected, you simply bury it. Take the bucket of vegetable matter to the garden with some dry material in another bucket. Dig a hole big enough for the material about 9-12 inches (20-30 cm) deep hole in an appropriate spot. Add the kitchen waste and dry waste in layers and cover it over. Label the spot so you know its location when you work the garden in the future.
3. Composting in Raised Mounds
This method requires less digging. In some ways it is akin to no-dig methods for establishing garden beds.
See: Starting a New Garden the No Dig Way using in-Garden Composting and Potatoes
Simply place the vegetable matter along with some dry material on the bed surface. Then rake or scrape soil over it to form a mound about 9 inches (20 cm) high. Pat it down. It should be very clear where the compost is located.