Combining Seed Tape, Baggies and Heated Bed Methods for Early Seed Germination
This new approach for early seed germination is based on the following observations:
- Extensive planting of seed into seed beds or jiffy pots can be expensive when the seeds do not germinate.
- Heat beds can help, but can be wasteful if there is poor germination, especially for long germination periods (weeks not days).
- Using 'baggies' with seed between layers of paper towel, coffee filters or peat moss and vermiculite in small plastic bags is helpful because you can see when the seed germinates. However, having to pick each sprouted seed up with a pair of tweezers and transplant them one at a time is very time-consuming and labor intensive.
- Seed tapes are an excellent way to plant seeds directly into the garden with spacings suitable for the plant species and the size of the seed. However, once again poor germination can cause problems with many gaps in the rows.
The following method was designed to address these issues in a cheap, easy and efficient way.
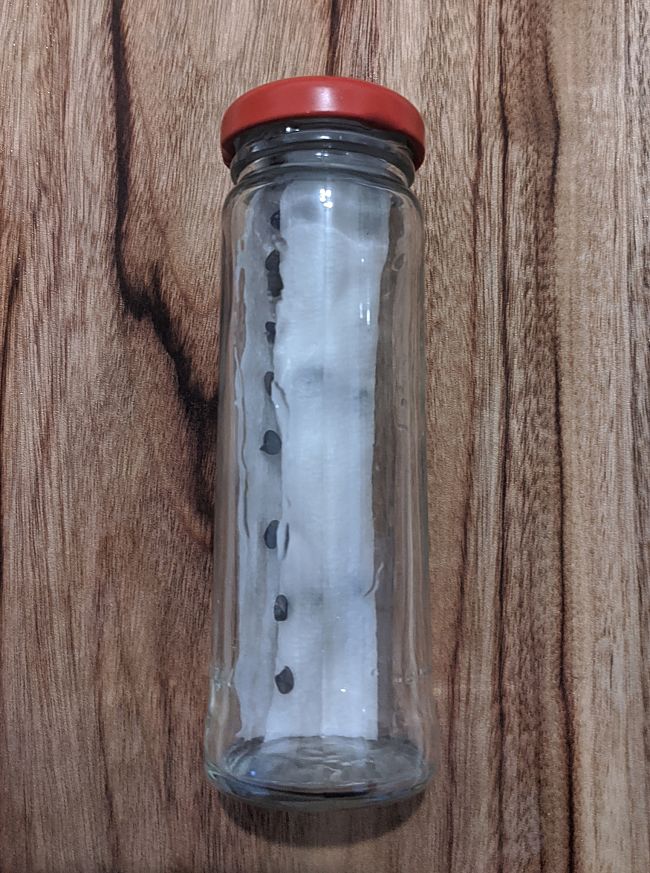
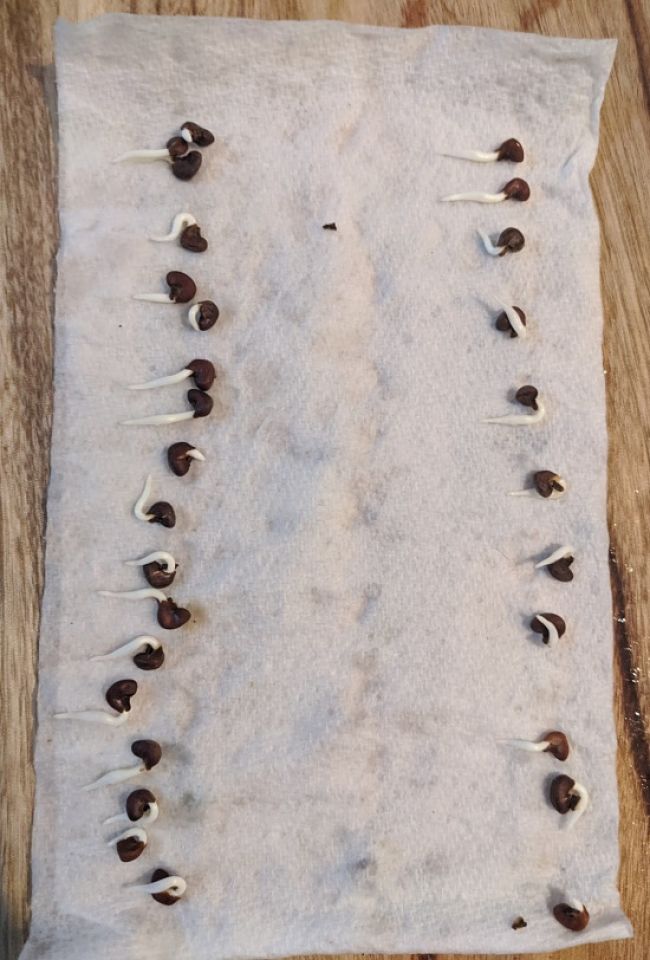
=> Seeds are germinated in paper towel 'roll-ups', stored in tiny glass jars
=> Many people use various types of 'baggies' with seed placed between layers of paper towel, in coffee filters or peat moss and vermiculite,
sprayed with water and then kept in small plastic bags. This is useful because you can see when the seed germinates. However, having to manually
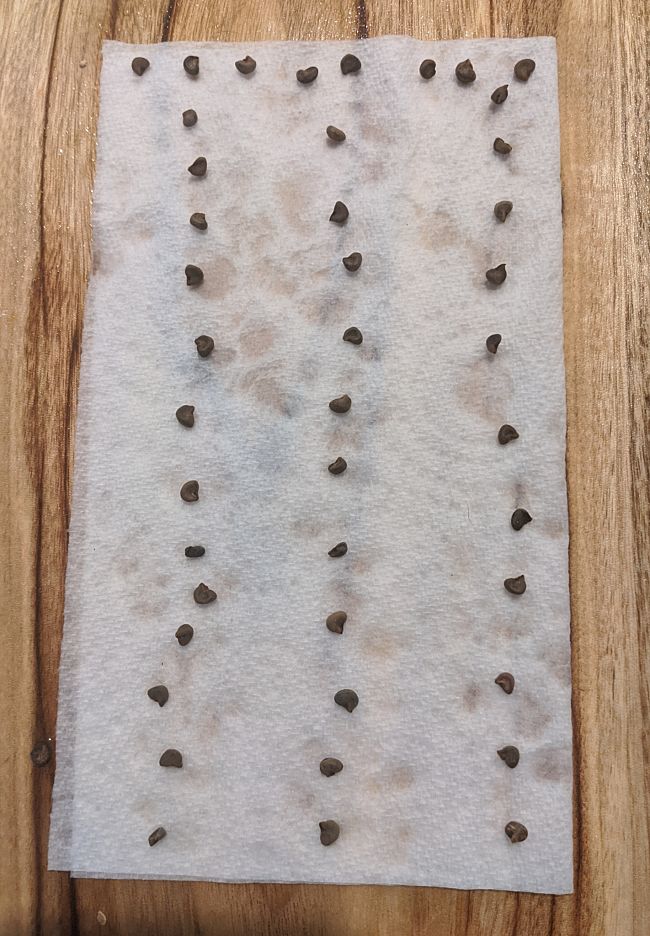
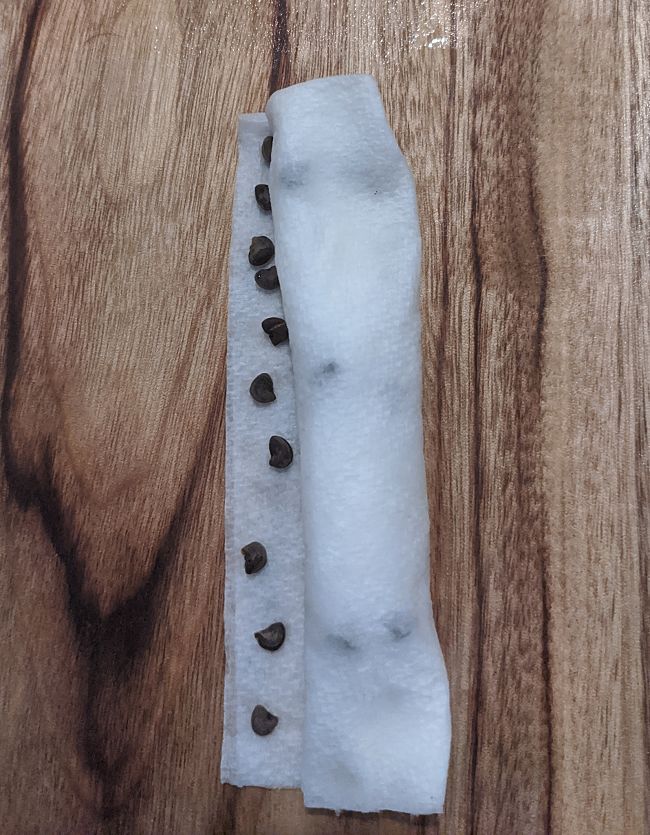
pick up each sprouted seed with tweezers is very time-consuming. The new method overcomes these problems by placing the seeds in two or three rows
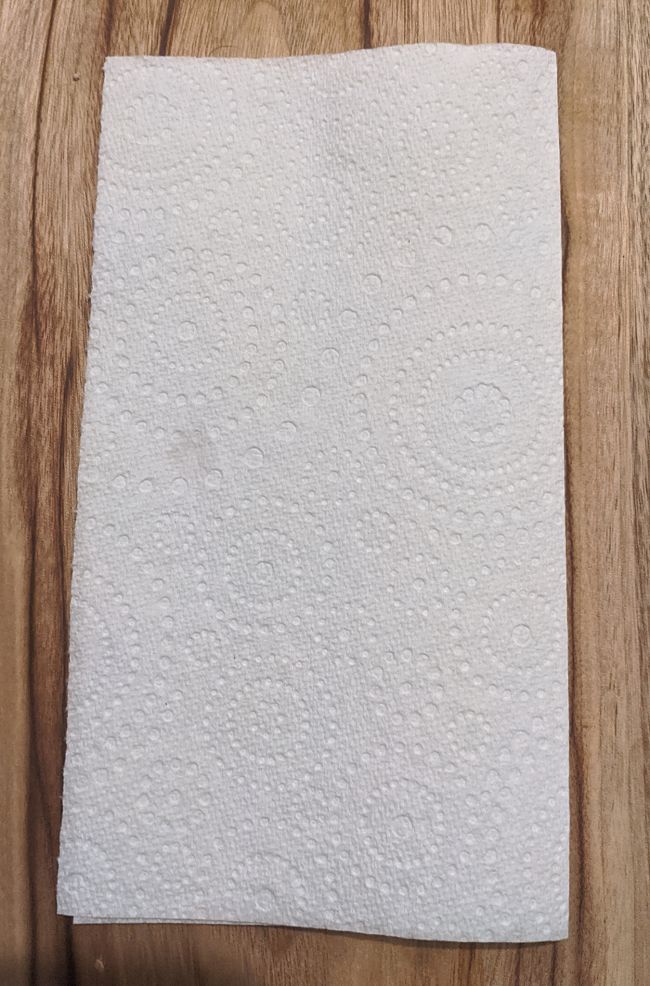
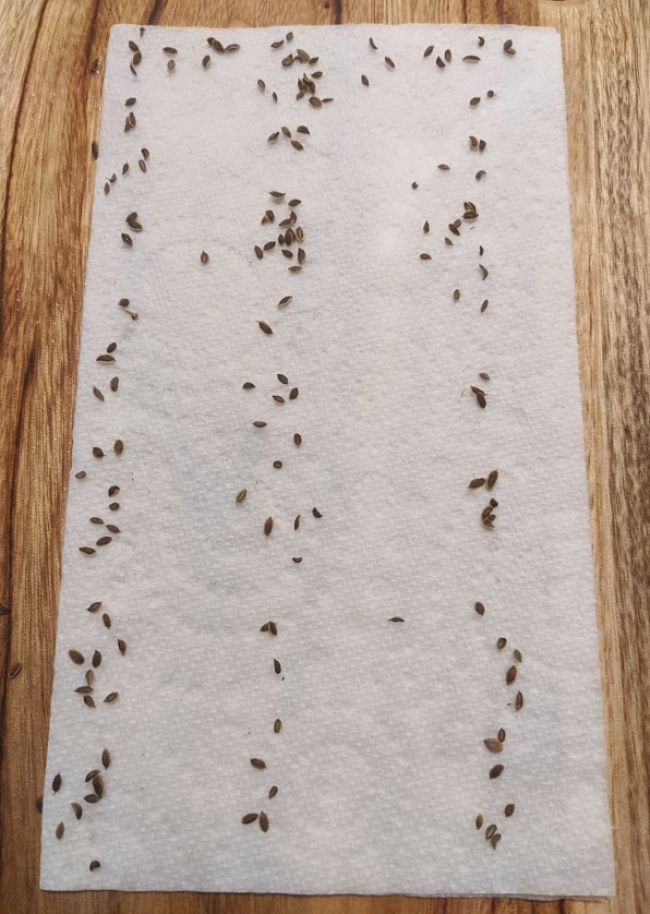
on paper towels. The folded towel is firstly sprayed with water. Then, the seed are added in 2-3 rows. Extra seeds are placed along the exposed outer edge
of the rolled-up paper towel so that you can see when the seeds have sprouted. The advantage of this method is that:
1. The roots will grow downwards.
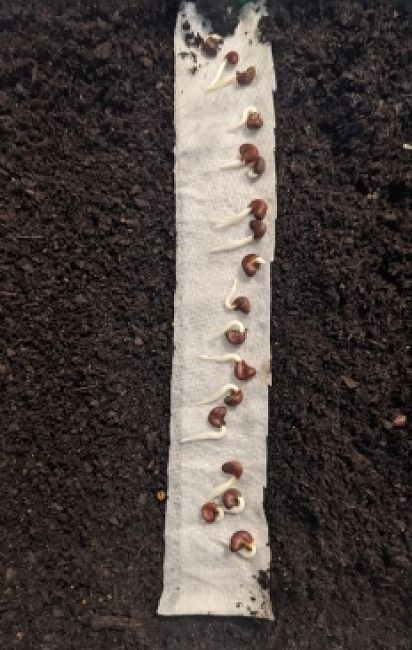
2. Two or three strips with sprouted seeds can be cut out and planted as seed tapes directly into the soil or
into seed trays.
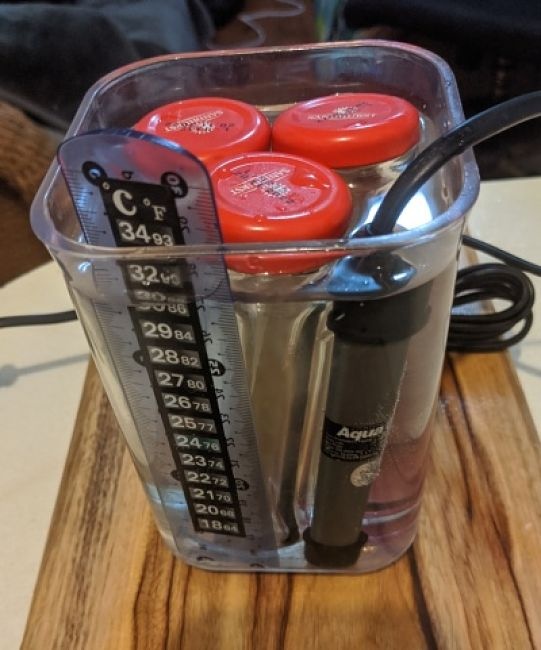
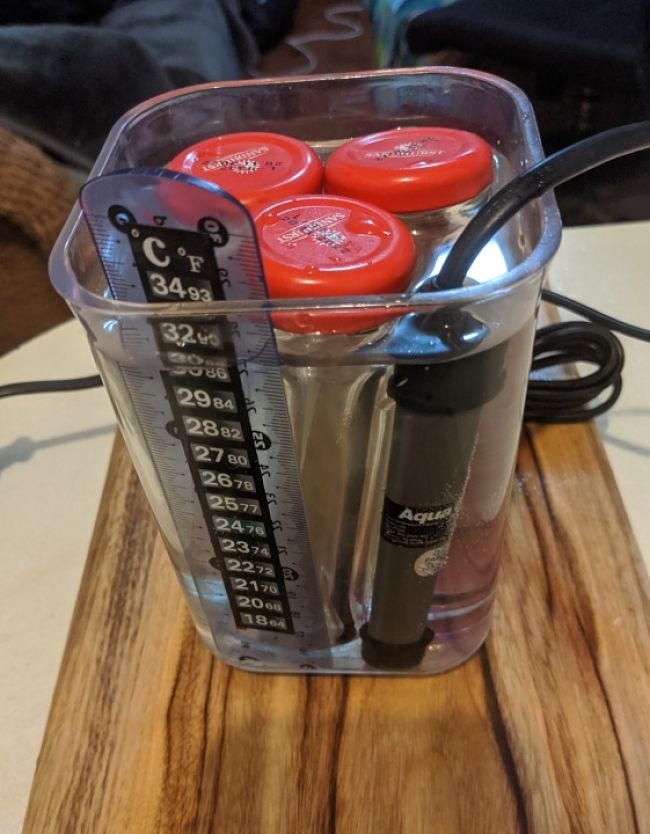
=> The "roll-ups" stored in glass jars can be placed in small containers of water heated by aquarium heaters.
=> The water in the jars can be topped up easily.
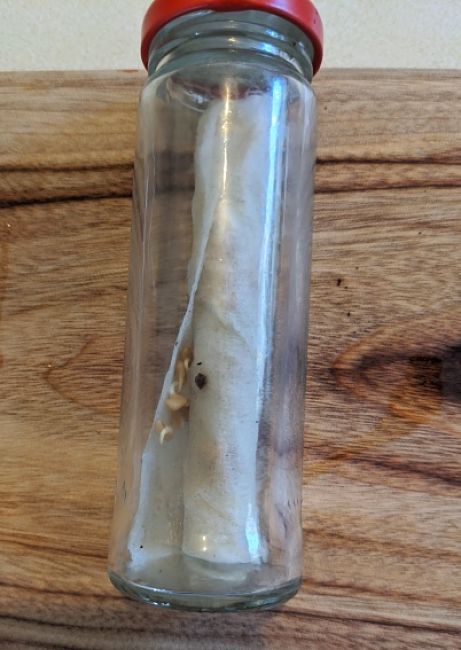
=> You can easily see when the seeds have sprouted.
=> You can unroll the paper towels cut into strips and plant as seed-tapes. Orientating the strips at an angle of 45 degrees will keep the seeds on the tapes when they are planted. The strips can also be cut into segments.
=> Sprouting the seeds in containers at aquarium temperatures of 24-27 degrees C helps to germinate the seeds quickly. The table at the end of the article shows that this temperature range is ideal for most plants. Aquarium heater can be used that have thermostats which can be set to a particular temperature. Having a constant temperature avoids the day-night (maximum-minimum) temperature cycle which can slow germination. This is much cheaper than heat beds under seedling trays or trays of jiffy-pots. The temperatures inside the jars are more controlled than using heat beds.
=> The method avoids wasting time and money caused by poor germination. You only plant out seeds that have germinated rather than planting in hope that they will germinate.
The images below outline the steps for the method
Preferred Germination Temperatures and Ranges for Common Herbs and Vegetables
| Plant | Minimum (°C) | Minimum (°F) | Preferred (°C) | Preferred (°F) | Days to Germinate |
| Herb | |||||
| Basil | 18 | 64 | 21-24 | 68-72 | 3-5 |
| Chives | 16 | 61 | 21 | 70 | 14-21 |
| Fenugreek | 16 | 61 | 21 | 70 | 3-5 |
| Lovage | 16 | 61 | 21 | 70 | 10-20 |
| Mint | 18 | 64 | 20 -24 | 67-72 | 10-15 |
| Parsley | 4 | 39 | 10-30 | 50-86 | 13-16 |
| Summer Savory | 18 | 64 | 20 | 68 | 14-21 |
| Vegetable | |||||
| Aubergine | 16 | 61 | 24-32 | 72-93 | 6-8 |
| Bean | 9 | 45-50 | 16-30 | 61-86 | 6-8 |
| Beet | 4 | 39 | 10-30 | 50-86 | 4-6 |
| Cabbage | 4 | 39 | 7-35 | 35-95 | 4-6 |
| Carrot | 4 | 39 | 7-30 | 35-86 | 6-8 |
| Cauliflower | 4 | 39 | 7-30 | 35-86 | 5-7 |
| Celeriac | 15 | 59 | 18-29 | 64-84 | 14-21 |
| Celery | 4 | 39 | 15-21 | 60-70 | 7-9 |
| Corn | 10 | 50 | 16-32 | 61-87 | 10 -12 |
| Cucumber | 16 | 61 | 16-35 | 61-88 | 3-6 |
| Lettuce | 2 | 36 | 4-27 | 39-81 | 3-5 |
| Onion | 2 | 36 | 10-35 | 50-95 | 6-8 |
| Parsnip | 2 | 36 | 10-21 | 10-70 | 14-17 |
| Pea | 4 | 39 | 4-24 | 39-72 | 6-8 |
| Pepper | 16 | 61 | 18-35 | 64-95 | 8-10 |
| Pumpkin | 16 | 61 | 21-32 | 70-90 | 4-6 |
| Radish | 4 | 39 | 7-32 | 45-90 | 4-6 |
| Rutabaga | 4 | 39 | 16-30 | 61-86 | 4-6 |
| Spinach | 2 | 36 | 7-24 | 45-75 | 5-7 |
| Squash | 16 | 61 | 21-35 | 70-95 | 4-6 |
| Swiss Chard | 4 | 39 | 20-23 | 68-73 | 4-6 |
| Tomato | 10 | 50 | 16-30 | 61-86 | 6-8 |
| Turnip/Rutabaga | 15 | 59 | 18-21 | 64-70 | 3 -6 |